Spaceman 6236A-C Pressurized Single Flavor High Output Countertop Soft Serve Ice Cream Machine with 1 Hopper - 208-230V
Item number 7156236cavMFR number 6236-AC

Works With
 Apply, opens link in this tab
Earn up to $400.86 back (40,086 points)
(40,086 points) with a Webstaurant Rewards Visa® Credit Card
Usually Ships in 2-3 Business Days from manufacturer
Lead times vary based on manufacturer stock
Product Overview
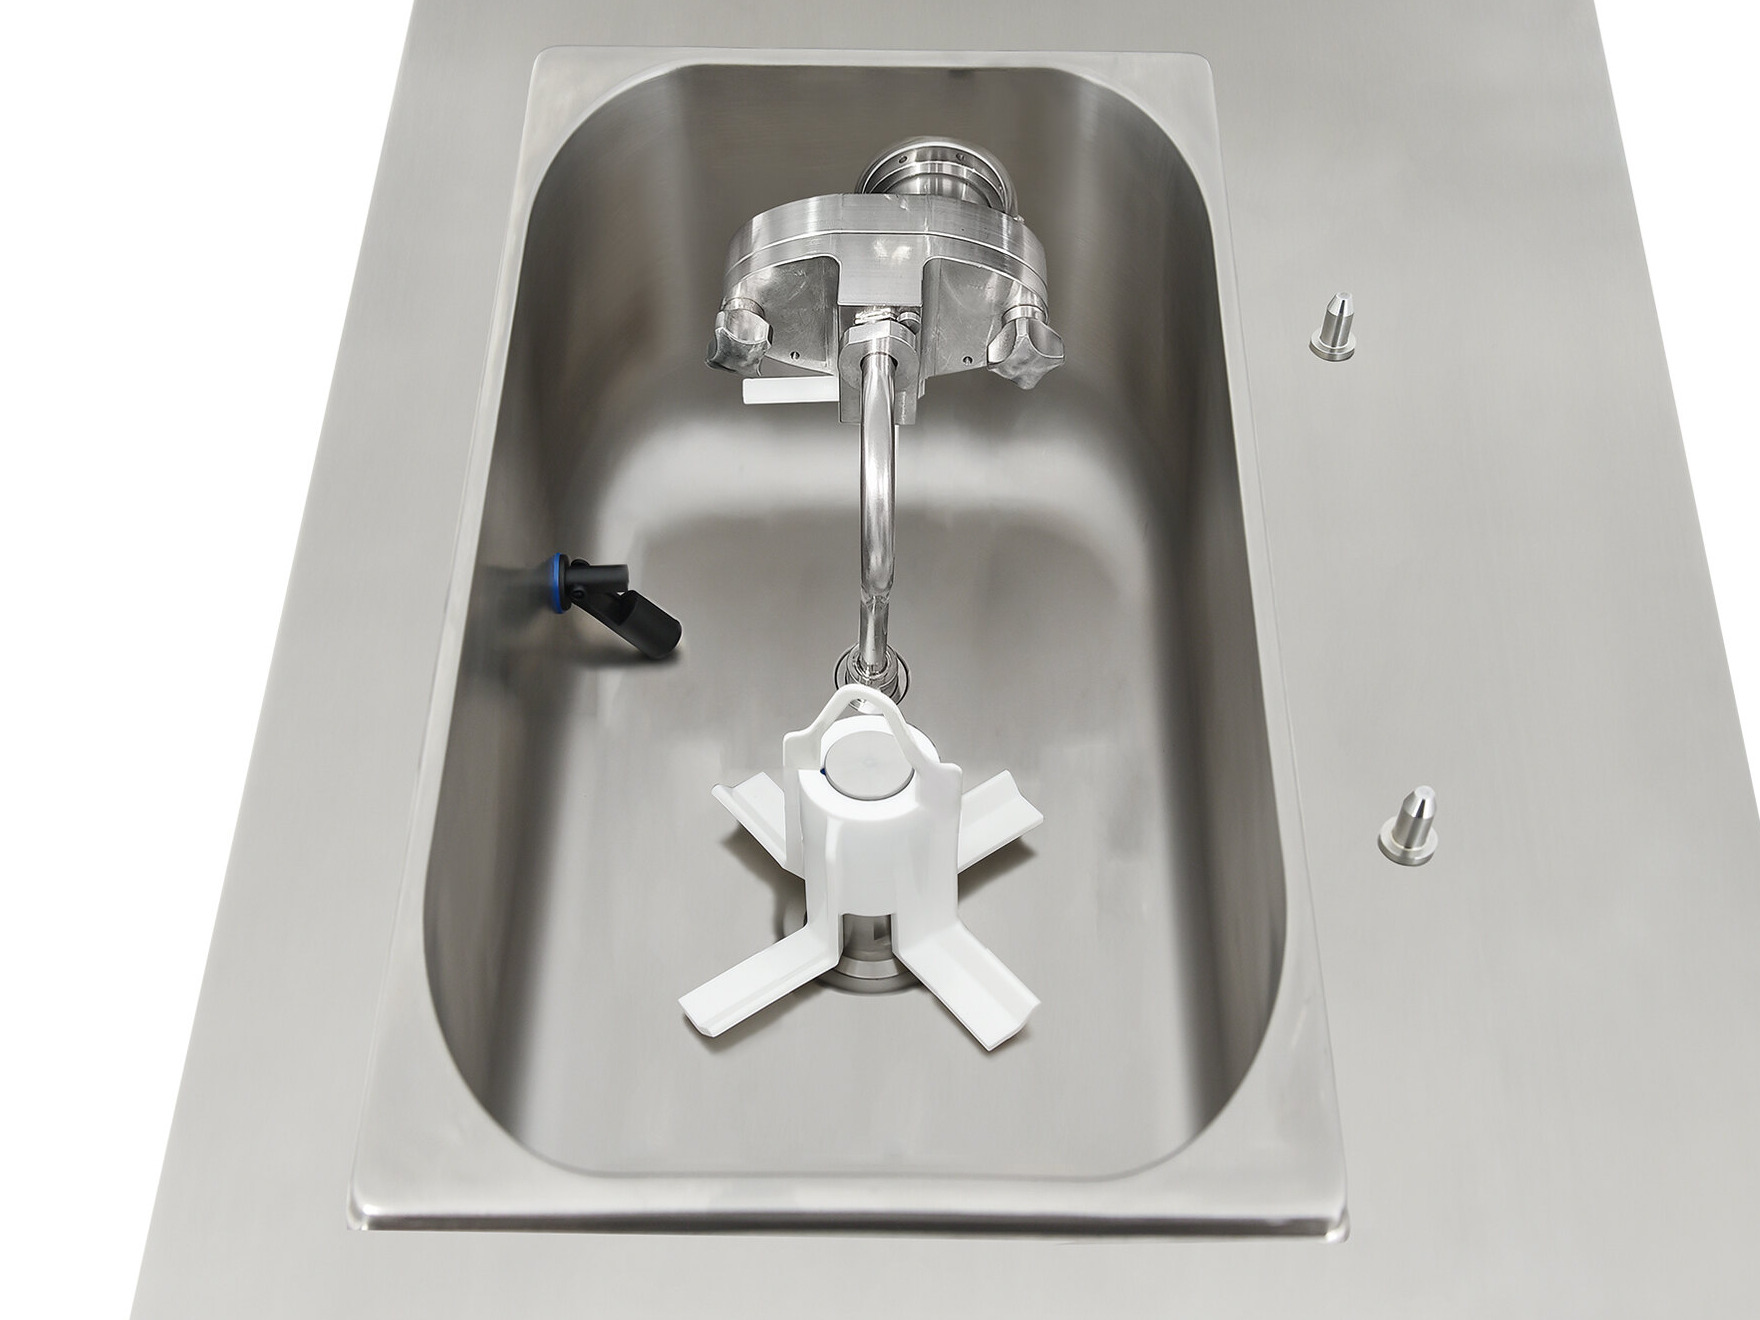
- Features (1) 13.8 qt. refrigerated mix hopper for single flavor dispensing
- Pressurized air pump offers six overrun settings
- Smart safety controls and independent standby modes
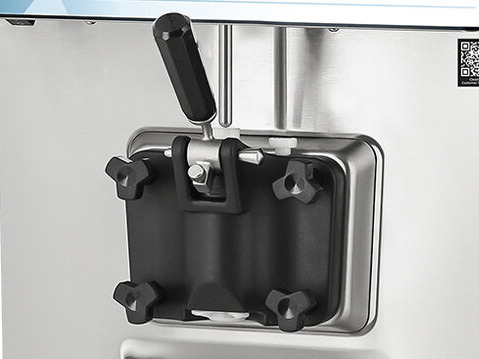
- V5 single-piece auger enhances product consistency
- Top-tier initial freeze time, recovery time, and servings per hour
UPC Code:400014213173
Works With
Expand your menu to offer soft serve style ice creams, custards, yogurt, gelato, or sorbet with this Spaceman pressurized single flavor countertop ice cream machine!
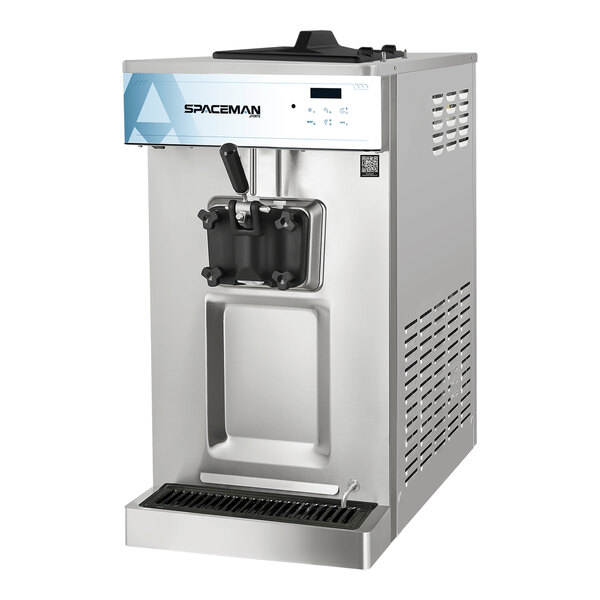
Approved for both dairy and non-dairy products, this unit produces high-quality soft serve with a superior taste and texture. This soft serve ice cream machine is packed with features and patented technology to make operation a breeze and minimize downtime. For an elegant ice cream machine that guarantees freshness and reliability with every use, look no further than the Spaceman ice cream machine! This unit uses R-448A refrigerant and requires a 208-230V electrical connection for operation. The inverter motor control allows the three-phase motors to run off a single-phase input, minimizing operational errors.

NSF Certified
This item is certified by NSF to applicable standards.

L6-20P
This unit comes with a locking NEMA L6-20P plug.

UL Certified
This product is certified to applicable standards and requirements by UL Solutions.

Precision Engineering
This machine is designed by aerospace engineers using microcrystal technology, ensuring superior craftsmanship and long-lasting durability. The compact footprint save on valuable countertop space, making this easy-to-install unit perfect for ice cream shops, restaurants, convenience stores, and delis with limited counterspace. Plus, the large 13.8 qt. refrigerated hopper makes it easy to serve up fresh product, and the fast freeze and recovery time ensure that you can keep up with high demand.

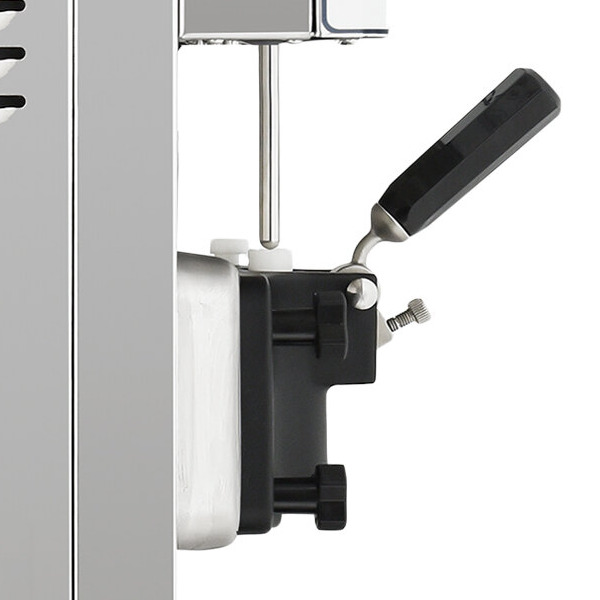
Pressurized Air Pump
This unit has a pressurized air pump feed and has six overrun settings to add even more air to create a lighter, fluffier product. It is easy to clean and maintain with minimal moving parts.

Standby Mode
The independent standby mode allows product in the machine to stay refrigerated while other components warm and cool, greatly reducing energy consumption during non-use.
Efficient and Reliable
The 3.4 qt. cylinder and V5 single-piece auger allow for low energy consumption and long-term texture in all your ice cream creations, offering a consistently delicious product that's sure to keep customers coming back for more!

Patented Freezing Technology
The patented 100% controlled contact flooded evaporator and patented freezing technology offer fast freeze-down and recovery times that are among the best in the industry for smaller ice crystals and a smooth, creamy mouthfeel.
Adjustable Output
The viscosity control and dispensing speed control allow you to adjust the output up to (350) 4 oz. servings per hour (16 oz. maximum serving size).
Smart, Safe, Secure
Smart safety controls automatically shut the machine down in case of low temperature, motor overload, or high pressure issues.
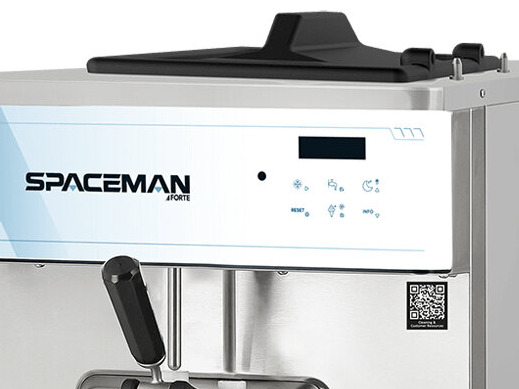
User-Friendly Design
An easy-to-use digital user interface and control system controls the refrigerated hopper's sleep and standby modes to maintain temperatures below 40 degrees Fahrenheit. This machine even features a low mix indicator light and alarm, so you can tell at a glance or be notified when it's time to add more mix. The auto-closing dispensing valve keeps product from spilling and helps to prevent messes, while the defrost mode makes cleaning the hopper a breeze!
Questions & Answers
Looking For Specific Info? Get quick answers to product questions with our AI-powered search.
Frequently Asked Questions From Customers
Requires 21 business days’ advance notice. Includes one on-site visit from a Spaceman factory-certified representative to train the operator on the proper operation of the unit. Note: Product installation is not included. The machine must be in ready-to-operate condition. The representative will confirm proper installation, perform a functionality test, and train the operator on cleaning and operating the machine. The operator must have the following items on hand and available for use during training: soft-serve mix or other frozen product to run through machines, no-rinse food-grade sanitizer solution, a bucket, and an operational three-compartment sink.
Available only in the contiguous United States. Excludes mobile kitchens and non-commercial applications.
Installation Program:
This option includes scheduled delivery, installation, and set in place of equipment. It requires 14 days' advance notice. A Spaceman-authorized technician will remove the crate and trash, set the machine in place, verify electricity, and perform a functionality test. Note: Proper voltage and plug should be available before the technician arrives for installation.
Available only in the contiguous United States. Excludes mobile kitchens and non-commercial applications.
Virtual Start-Up:
Includes online resources with instructions for proper start-up and maintenance of the machine. Remote customer services are available if needed.
Compare to Other Products
Price
Width
Depth
Height
Voltage
Capacity
Capacity (per Compartment)
Installation Type
Number of Hoppers


- Width:
- 17 15/16 Inches
- Depth:
- 31 3/4 Inches
- Bottom Depth:
- 27 5/8 Inches
- Height:
- 37 1/2 Inches
- Capacity:
- 13.8 qt.
This Item Ships via Common Carrier. For more information and tips to help your delivery go smoothly, click here.
Because this item is not stocked in our warehouse, processing, transit times and stock availability will vary. If you need your items by a certain date, please contact us prior to placing your order. Expedited shipping availability may vary. We cannot guarantee that this item can be cancelled off of the order or returned once it is placed.
Need Parts & Accessories?
Show replacement parts and accessories for Spaceman 6236-AC today!
Resources and Downloads for Spaceman 6236-AC

Specsheet
Opens in new tab
Manual
Opens in new tab
Instructions
Opens in new tab
Warranty
Opens in new tab
Extended Warranty
Opens in new tab
Cleaning Guide
Opens in new tab
Installation Checklist
Opens in new tab
Size Guide
Opens in new tabA PDF viewer is required to view this product's information. Download Adobe Acrobat softwareOpens in new tab
Warranty Info
Warranty only valid once training is complete. Please contact Customer Solutions for details.
INTERNATIONAL USERS:For users outside the United States, Spaceman offers a one year part warranty. Any labor costs incurred by an onsite technician are not covered.
Condensers must be cleaned annually (at a minimum) and documented by buyer in order to maintain the compressor warranty. RESIDENTIAL USERS: Spaceman assumes no liability for parts or labor coverage for component failure or other damages resulting from installation in non-commercial or residential applications. Your warranty will be voided if installed in non-commercial or residential applications.