


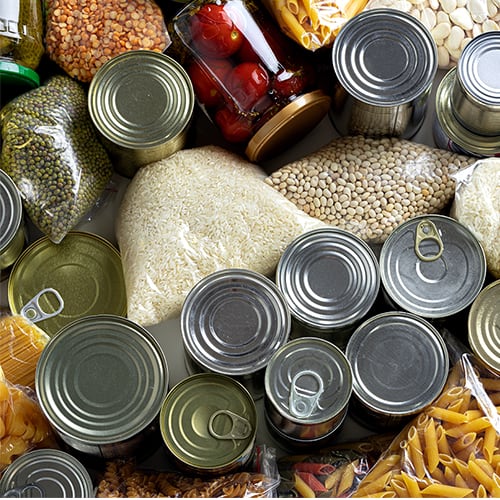
Canning is a method of preserving food inside specialized jars to extend shelf life and maintain quality. This process is utilized not just by commercial businesses such as coffee shops or bakeries, but also by at-home businesses like meal planning or catering companies, independent bakers, or artisan vendors who aim to create safe products that are easy to sell or serve. Whether you operate a large-scale commercial kitchen or a small business, understanding the fundamentals of canning and ensuring a safe canning process is crucial to uphold the quality of your goods and prioritize the safety of your customers.
Shop All Canning Jars and Accessories
What Is Canning?
The primary goal of canning is to eliminate harmful microorganisms that can cause food to go bad and pose health risks by applying heat to the food inside the container, effectively killing off any pathogens. Through this process, you remove the air from the container, creating a vacuum seal that ensures nothing gets in or out while the lid is on. The careful balance of time and temperature during the canning process is crucial to reducing the risk of health hazards associated with consuming spoiled or contaminated products. For that reason, you must follow the proper canning procedures and use the right equipment.
Canning Methods
When it comes to canning food for your kitchen, there are two accepted methods available: water bath canning and pressure canning. Each method has its own set of advantages and is better suited for different types of foods. Before diving into the canning process, carefully evaluate the goods you sell or the needs of your menu to determine which method will work best.
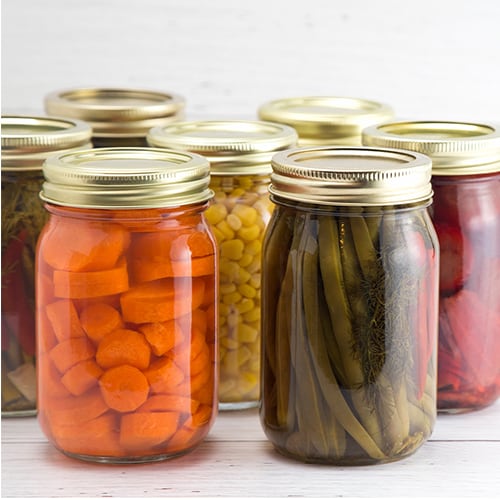
What Is Water Bath Canning?
Water bath canning involves submerging sealed jars in boiling water to preserve their contents. The heat from the boiling water expands the air inside the jar, forcing it out and establishing the vacuum seal. Despite the use of boiling water, water bath canning is actually the lower temperature canning option. This method of canning is best for high-acid foods and recipes, such as:
- Fruit
- Fruit juices
- Jams, jellies, and fruit spreads
- Salsa
- Tomatoes
- Pickles
- Relish
- Chutney
- Acidic condiments and sauces
Water Bath Canning Equipment
Water bath canning is a straightforward method for preserving food, but it does require specific equipment to ensure a safe and secure canning operation. Whether canning at home or in a commercial kitchen, you'll need the following supplies:
- Boiling water bath canner: A boiling water bath canner is the central piece of equipment for water bath canning. It features a deep saucepot and sometimes comes with a rack designed to hold the jars in place.
- Glass jars: Use jars specifically designed for canning and built to withstand the high heat of the canning process. Ensure that the jars come with attachable lids and bands that are the correct size to create a tight seal.
- Jar lifter: This specialized tool helps you grip hot jars so you can safely lower them into the water bath and lift them out once the canning process is complete without the risk of burns or spills.
- Canning funnel: A canning funnel allows for easy and precise transfer of food into your jars. It helps to prevent spills and ensures that the food is neatly and safely packed into the jars, minimizing waste and mess.
How to Water Bath Can
Water bath canning yields effective, professional-level canning results when executed correctly. Follow the steps below to navigate the process and make sure your goods are properly preserved.
- Prepare the water: Begin by filling the canning pot with the necessary amount of water. For optimal results, the water should reach 1-2 inches above the lid of your filled jars.
- Preheat the pot: To effectively eliminate any harmful organisms inside the cans, it is recommended that the water reach at least 180 degrees Fahrenheit. Use a kitchen thermometer to verify the water temperature.
- Load the jars: Using your jar lifter, place each jar into the pot one at a time once the water reaches the correct temperature. Ensure that the jars are kept upright. If you have a canning rack, you can use it to submerge the jars as long as they still have the necessary amount of water overhead.
- Cover the pot and let the jars sit: With the jars securely in place, cover the pot and turn up the heat. Bring the pot to a rolling boil. Remember to set a kitchen timer. The duration the jars should remain in the water varies depending on the recipe, but most recommend at least 10 minutes.
- Turn down the heat: Once your timer goes off, turn off the heat to stop the water from boiling. Allow the contents of the cans to settle by waiting at least five minutes before removing them from the water.
- Cool down: Using your jar lifter, remove the jars from the water one by one, keeping them upright to preserve their contents.
- Let the jars cool: Place the jars in a secure spot to cool at room temperature, avoiding extreme temperatures or drafts. Allow each jar at least 1 inch of space from the next for efficient cooling. Let them rest for 12 to 24 hours, depending on the recipe. Once cooled, store the jars in a cool, dry place away from direct light until they are ready for use or sale. After the can is cooled, check to make sure it has a secure seal.
What Is Pressure Canning?
Pressure canning utilizes pressurized steam and high temperatures to process and preserve foods. It is particularly helpful in eliminating the bacteria that can cause botulism, a serious foodborne illness. Maintaining consistent temperatures and pressure levels is key in this process, necessitating your undivided attention. The pressure canning method is the only approved method for low-acid foods, and it works best for prepared meals or those that are used as ingredients for meal planning. These foods include:
- Meat
- Poultry
- Seafood
- Chili
- Prepared soups
Pressure Canning Equipment
When it comes to pressure canning, the equipment you use plays a crucial role in ensuring a successful and safe canning process. Pressure canning can be dangerous if you are careless, so you must adhere to strict safety guidelines.
- Pressure canner: A pressure canner is a specialized pot designed to trap steam and create the necessary pressure for canning. These canners are typically constructed from durable materials such as stainless steel or aluminum to withstand the pressure they generate.
- Canning jars: You will need canning jars along with the appropriate lids and bands to seal the jars securely.
- Canning funnel: The canning funnel is especially helpful for pressure canning, ensuring that nothing gets caught between the lid and the jar and threatens the pressurizing process.
- Jar lifter: Pressure canners generate an immense amount of heat, and as such, a jar lifter is essential to avoid direct contact with the jars inside.
How to Pressure Can
Whether you’re canning prepared meats, seafood, or any other non-acidic goods for sale, the pressure canning process is essential to maintain product quality and customer safety. The process is relatively simple, given that you take your time and use the right equipment. Keep in mind that different pressure canning machines may have different guidelines for operation. You should always consult your product manual before you begin, and follow these steps to complete the process the right way:
- Prepare the pot: Clean the pressure canner pot and make sure there are no blockages in the pipes, gaskets, or vents so that your unit can properly maintain pressure.
- Add water: The exact amount of water you need to put inside the unit will vary depending on the manufacturer, the types of foods you are canning, and how long you plan to use the canner. Read the user manual and any canning recipes for guidance.
- Insert jars: Using your jar lifter, insert each jar into the unit one at a time. Keep them securely positioned and upright at all times to prevent their contents from spilling out or disrupting the seal. Once all jars are in place, secure the lid on top of the unit.
- Turn up the heat: With the lid secure and sealed, turn the heat setting up to the highest setting until the water begins to boil and the vent pipe emits steam. Let the steam flow for 10 minutes or as per the unit’s instructions.
- Maintain pressure: Regulate the heat to maintain recommended pressure levels for canning your goods. Loss of pressure, even for a brief moment, will disrupt the process and put your goods at risk.
- Depressurize: Once the recommended time has elapsed, turn off the heat and let the unit cool down on its own to depressurize. Avoid doing anything to cool the pot down faster, as this can disrupt the sealing process and cause spoilage.
- Remove the cans: After depressurizing, allow the unit to cool for 10 minutes or as specified by your unit before removing the weight from your vent pipes. Be cautious when lifting the lid to prevent burns from escaping steam.
- Remove the jars: Using your jar lifter, remove the jars from the unit one at a time. Maintain at least 1 inch of space between each can for proper cooling, and let them rest at room temperature to avoid cooling too fast.
- Let the jars cool: Depending on what you’ve canned, the jars may need to sit for 12 to 24 hours before they are ready for storage. Once properly cooled, place them in a cool, dry space away from direct sunlight until they are ready for use or sale. After the can is cooled, check to make sure it has a secure seal.
Canning FAQ

Since many people aren’t familiar with the canning process, there are many frequently asked questions on the topic. We’ll answer some of the most popular to help you through the process.
How to Sterilize Canning Jars
Sterilizing your canning jars is a crucial step in the canning process to ensure the safety and longevity of your preserved goods. Canning jars can be sterilized using two main methods: by submerging them in boiling water or by exposing them to heat in the oven. It's important to note that you'll only need to sterilize your jars if the canning process requires your jars to be submerged in boiling water for less than 10 minutes. This may apply to delicate goods and select recipes that can't be exposed to heat for extended periods. If the canning process lasts more than 10 minutes, the jars will be sterilized during that time.
- Boiling water method: Fully submerge empty jars in boiling water for 10 minutes. Once time is up, use a jar lifter to pull the jars out of the boiling water. Allow the jars to fully cool before filling them with your preserved goods.
- Oven method: Place the jars in an oven preheated to 220 degrees Fahrenheit for 20 minutes. Be cautious not to let the oven get too hot, as this can potentially damage the jars. After the designated time elapses, remove the jars from the oven and let them cool before filling them with your canned items.
Can You Reuse Canning Lids?
You cannot reuse canning lids. Once you have completed the canning process the first time, the lid will have a permanent indent created during the sealing process, which is essential for creating an airtight seal on the jar. If you attempt to reuse a canning lid, this indent will no longer be effective, and the lid will not seal correctly upon further use.
Back to Top
Canned goods are a staple in foodservice and retail environments, allowing you to preserve ingredients for use in your signature recipes or sell them for home use. While it may seem easy, canning is a delicate process, and it is essential to understand which method to use and how to execute that method the right way.