Whether you are preparing a festive holiday feast or elevating your catering menu, a perfectly carved ham is certain to impress your patrons with its flavorful taste and ease of serving. Properly carving ham not only enhances the presentation but also maximizes the yield and preserves the meat's quality. Whether you’re cutting a spiral ham or carving a boneless ham, we walk you through the cutting techniques for the most popular ham varieties.
Shop All Meat Slicing and Carving KnivesHow to Cut a Spiral Ham

By following these simple steps, you can easily cut a spiral ham for your commercial kitchen or foodservice establishment. Whether you are preparing a holiday meal or setting up a carving station on your buffet line, mastering the art of cutting a spiral ham will help you deliver delicious and visually appealing dishes to your customers.
- Position the Ham: Place the spiral ham on a clean cutting board with the flat side facing down. This will provide a stable surface for slicing and prevent the ham from moving around.
- Use a Carving Fork: To hold the ham steady while slicing, use a carving fork to secure the meat in place. This will help you maintain control and precision as you carve the ham.
- Locate the Bone: Identify the bone running through the center of the ham. This bone serves as a guide for cutting and will help you create even slices.
- Start at the Top: Begin slicing the ham from the top, near the bone. Use a sharp carving knife to make a shallow cut along the top of the ham, following the natural lines of the spiral cuts.
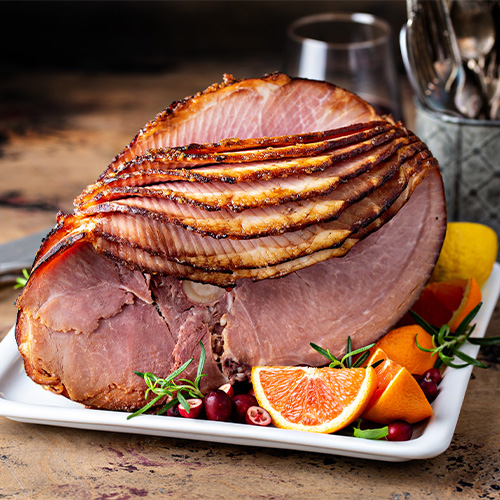
- Follow the Spiral Pattern: The pre-sliced spiral pattern is perfectly portioned for serving.
- Slice Downward: As you cut, angle the knife slightly downward to follow the shape of the ham. This will help you maintain a consistent thickness in each slice and create slices that are easily separable.
- Serve and Enjoy: Once you have sliced the desired amount of ham, arrange the slices on a serving platter or plate. Spiral ham slices can be served warm or cold, making it a convenient option for both lunch and dinner service.
How to Carve Bone-In Ham
Carving a bone-in ham requires precision and skill to ensure that each slice is cut clean and evenly. Follow these step-by-step instructions to carve a bone-in ham like a pro:
- Prepare Your Tools: Before you begin carving, make sure you’ve sharpened your carving knife and have a cutting board and a serving platter ready.
- Position the Ham: Place the bone-in ham on the cutting board with the bone facing upward. This will make it easier to carve the meat around the bone.
- Locate the Bone: Identify where the bone starts and ends to determine where to make your initial cuts.
- Slice Along the Bone: Using a sharp carving knife, make a vertical cut along the bone to separate the meat from the bone. Cut down to the bone and then follow the bone's shape as you continue slicing the meat away.
- Slice the Meat: Once you have separated the meat from the bone, start slicing the meat perpendicular to the bone. Cut thin slices for serving.
- Repeat on the Other Side: Turn the ham over and repeat the same process on the other side of the bone to carve the remaining meat.
- Serve and Enjoy: Arrange the slices on a serving platter and garnish with herbs or fruits for an attractive presentation. Serve the delicious bone-in ham to your guests and enjoy the flavorful meat.
How to Carve Boneless Ham

Proper carving techniques are essential to ensure that each slice of ham is presented beautifully and maintains its delicious flavor. Follow these step-by-step instructions to carve a boneless ham with precision and ease.
- Prepare Your Tools: Before you begin, make sure you have a sharp carving knife, a carving fork, and a cutting board. These tools will help you slice the ham cleanly and efficiently.
- Slice the Ham Horizontally: Start by placing the boneless ham on the cutting board with the flat side down. Using your carving knife, make a horizontal cut across the ham to create an even base for slicing.
- Create Thin Slices: Begin slicing the ham parallel to the cutting board, starting from one end and working your way to the other. Aim to cut thin, even slices to ensure that each serving is uniform in size and texture.
- Serve and Enjoy: Once you have carved the desired amount of ham, arrange the slices on a serving platter or tray. Garnish with herbs or glaze for added flavor and visual appeal. Serve the boneless ham slices to your guests and enjoy the delicious results of your carving skills.
How to Carve a Ham Butt
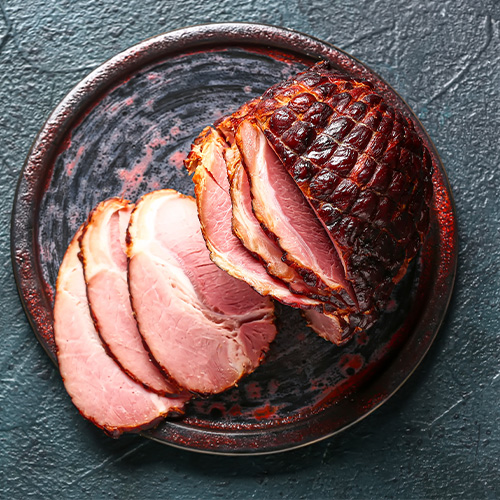
When it comes to cutting a ham butt, also known as the shank end of a ham, following the proper technique is essential to ensure that you get the most out of your slices. Here is a step-by-step guide on how to carve a ham butt:
- Prepare Your Tools: Before you begin, make sure you have a sharp carving knife, a carving fork, and a cutting board ready.
- Position the Ham: Start by placing the ham butt on a stable surface with the cut side facing down.
- Locate the Hock: Identify the hock, which is the joint where the shank bone meets the ham. This is where you will begin carving.
- Slice Along the Bone: Using your carving knife, cut the bone starting from the hock. Follow the natural curve of the bone to separate the meat from the bone.
- Slice the Meat: Once you have separated the meat from the bone, begin slicing the meat against the grain to your desired thickness.
- Continue Slicing: Work your way around the ham butt, slicing off portions of meat as you go. Remember to maintain a steady hand and keep your slices uniform.
- Serve and Enjoy: Once you have carved the entire ham butt, arrange the slices on a platter and serve them to your guests.
How to Carve a Half Ham
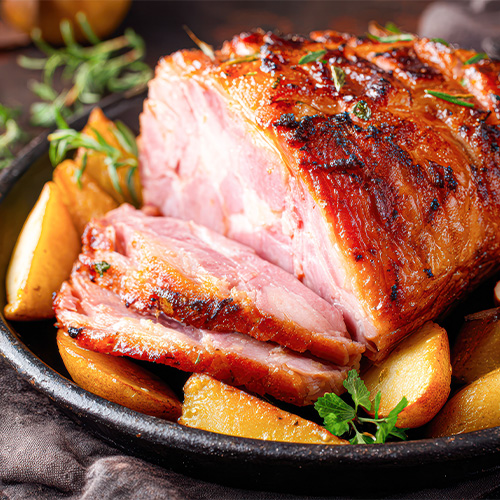
By following these steps, you can confidently carve a half ham like a professional, impressing your guests with perfectly sliced portions and a visually appealing presentation.
- Prepare Your Tools: Before you begin, make sure you have a sharp carving knife, a carving fork, and a cutting board ready. Having the right tools will make the carving process easier and more precise.
- Start at the Shank End: Place the ham on the cutting board with the shank end facing you. This is the end of the ham that is narrower and has the bone running through it.
- Slice Along the Bone: Using your carving knife, make a horizontal cut along the bone to create a flat surface for stability. This will help prevent the ham from rolling as you carve.
- Slice Thinly: Starting at the shank end, begin slicing the ham thinly against the grain. Slicing against the grain will help ensure that each slice is tender and easy to chew.
- Carve Along the Bone: As you work your way along the bone, use the carving fork to hold the ham steady and guide your knife. Continue slicing until you reach the other end of the ham.
- Slice and Serve: Once you have carved all the way through the ham, transfer the slices to a serving platter. Arrange the slices neatly to create an attractive presentation for your guests.
- Save the Bone: After carving the ham, don't discard the bone! You can use it to flavor soups, stews, or beans, adding a rich, smoky taste to your dishes.
How to Cut a Whole Ham in Half Before Cooking
When preparing a whole ham for cooking, it may be necessary to cut it in half to fit your roasting pan or to make handling more manageable. Here is a step-by-step guide on how to cut a whole ham in half before cooking:
- Gather Your Tools: Before starting, make sure you have a sharp chef's knife, a cutting board, and a clean kitchen towel for a secure grip.
- Position the Ham: Place the whole ham on a stable surface, such as a cutting board, with the fat side facing up.
- Locate the Center: Identify the center of the ham by the bone that runs through the middle. This will guide you in making an even cut.
- Make the Initial Cut: Using your sharp chef's knife, carefully slice through the ham along the bone to divide it into two halves. Apply steady pressure and use a sawing motion to ensure a clean cut.
- Follow the Natural Contours: As you continue cutting, follow the natural contours of the ham to maintain even halves. This will help the ham cook more evenly and present a uniform appearance when served.
- Trim any Excess Fat: After cutting the ham in half, you may choose to trim any excess fat for a leaner result. Use your knife to remove any visible fat, being careful not to remove too much, as fat adds flavor and moisture to the meat.
- Wrap and Store: If you only plan to cook half of the ham, wrap the other half tightly in plastic wrap and store it in the refrigerator for future use. Use it within a few days to ensure freshness.
Ham Cutting FAQ
Now that you know the steps to carve the most popular ham cuts, you might still have questions about slicing and serving ham. Find answers to common questions about cutting ham below:
How Long to Let Ham Rest Before Carving
The general rule of thumb is to let the ham rest for a minimum of 3 to 5 minutes per pound. For a larger ham, such as a whole ham, it is recommended to let it rest for about 15 to 20 minutes. During this resting period, the juices inside the ham will redistribute, resulting in a more flavorful and moist texture. This is especially important for hams that have been cooked or reheated, as it allows the meat to relax and retain its juiciness. Additionally, while the ham is resting, its internal temperature will continue to rise slightly. This residual heat will help ensure that the ham is cooked to the desired level of doneness and will also contribute to a more succulent eating experience.
What Is a Carving Ham?
Carving ham is a variety typically obtained from the hind leg of the pig and is known for its tender texture and succulent taste. It’s often smoked and cured to enhance its flavor profile, making it a favorite among customers looking for a delicious and savory option. In addition to its delicious taste, carving ham is also a cost-effective option for businesses looking to add a high-quality protein to their menu. Its long shelf life makes it a convenient choice for establishments that require a consistent supply of premium meat products.
When it comes to commercial applications, carving ham is a staple in delis, restaurants, and catering businesses. It can be sliced thinly for sandwiches and charcuterie boards or cubed for salads and soups, making it an adaptable ingredient that can be incorporated into a wide range of dishes.
What Is a Spiral Ham?
A spiral ham is a type of ham that has been pre-sliced in a spiral pattern around the bone, making it easy to serve and reducing waste during slicing. These hams are typically bone-in, which helps enhance the flavor during cooking and provides a stunning presentation when sliced. The spiral slicing allows for even cooking throughout the ham, ensuring that each slice is juicy and flavorful. This method of cutting also makes it effortless to serve uniform slices, making it an excellent choice for buffet-style service or catering events.
In general, spiral hams present a versatile and convenient option for commercial kitchens seeking to offer a scrumptious and visually appealing ham dish. They are commonly pre-glazed or seasoned, saving you the time and effort of developing your own marinade. They’re offered in various weights, providing flexibility in selecting the ideal size for your establishment. The manufacturer typically provides cooking guidelines, helping you prepare it to perfection.
Carving ham may seem like a daunting task at first, but with practice and the right techniques, you can become a pro in no time. Please remember to use a sharp knife and invest in a carving fork to get the best results. Whether you are serving ham in a restaurant, deli, catering event, or other commercial setting, mastering the art of cutting ham will help you deliver high-quality dishes to your customers. So, grab your carving knife, hone your skills, and get ready to showcase your culinary expertise with beautifully carved ham.
