


Whether you are running a small home bakery or managing a large-scale operation, mastering the art of bread proofing is essential for producing high-quality baked goods. Bread proofing facilitates even rising, creates a desirable texture, and develops a delicious flavor in the final product. We cover everything from what proofing is and how to do it to the tools required and tips for success.
What Is Bread Proofing?

Proofing is a crucial step in the bread-making process where the bread dough ferments and rises before it is ready to be baked. During proofing, the yeast present in the dough consumes the sugars and starches, producing carbon dioxide as a byproduct. This carbon dioxide is then trapped within the gluten network of the dough, causing it to expand and rise. As the bread proofs, it typically doubles or nearly doubles in size, resulting in a puffy and pillowy texture once baked.
Proofing vs Bulk Fermentation
Proofing and bulk fermentation are two baking terms that refer to similar yet separate steps in the bread-making process. Proofing, also known as the final rise, is the process of allowing the shaped dough to ferment and rise before baking. During proofing, the dough undergoes its final expansion, resulting in a light and airy texture in the finished bread. This step is vital for developing the bread's flavor and creating a well-structured crumb.
Bulk fermentation, on the other hand, occurs earlier in the bread-making process and involves fermenting the entire batch of dough before it's shaped. This step allows the yeast to develop and ferment the sugars in the dough, producing carbon dioxide gas, which helps the dough rise. Bulk fermentation also develops complex flavors and improves the overall texture of the bread.
Proofing Sourdough Bread vs Proofing Yeast Bread
Bakers must proof bread, whether it is made with a sourdough starter or commercial yeast, but the process and timing can vary significantly. Sourdough fermentation relies on a wild yeast culture, known as a sourdough starter, which takes longer to develop flavors and acidity compared to commercial yeast. Sourdough bread typically ferments best at temperatures between 75 to 82 degrees Fahrenheit. Sourdough is often cold-proofed in the refrigerator for 10 to 16 hours or even longer, up to 48 hours. This extended proofing time in the refrigerator can slow down fermentation and increase sourness in the bread.
Commercial yeast, such as baker's yeast, is a specific, fast-acting strain of yeast that promotes quicker rise. Commercial yeast breads typically proof best at temperatures around 75 to 78 degrees Fahrenheit. The bulk fermentation for commercial yeast breads is often shorter than sourdough, as the yeast works faster. After shaping, commercial yeast breads are often proofed at room temperature for 1 to 3 hours or until they double in size. This shorter proofing time is a result of the fast-acting nature of commercial yeast, which allows for a quicker rise compared to sourdough bread.
How to Proof Bread
Proofing is an essential step in the bread-baking process that allows the dough to rise and develop its flavor and texture. Properly proofed bread will have a light and airy crumb with a well-developed crust. Here are the key steps to proofing bread effectively in a proofer oven:
- Preheat the Proofer Oven: Before placing your dough inside the proofer oven, preheat it to the desired temperature. Most proofer ovens have adjustable temperature settings, so set it according to your recipe's requirements. A temperature between 75 to 82 degrees Fahrenheit for sourdough or 75 to 78 degrees Fahrenheit for commercial yeast is typical.
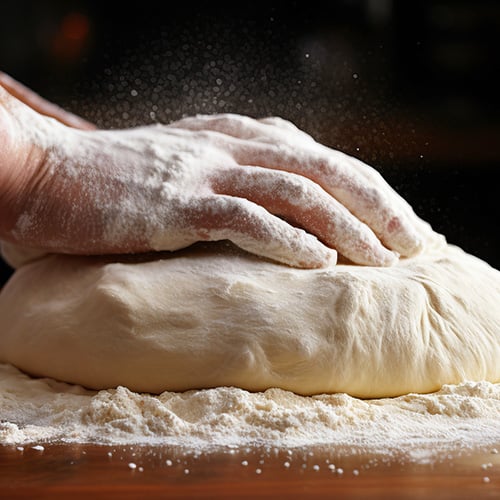
- Prepare Bread Dough According to Recipe: Follow your bread recipe carefully to ensure you have the right ingredients and measurements. Precision is necessary for baking, so use a baker's scale to measure ingredients. Mix and knead the dough until it reaches the desired consistency.
- Fill the Proofer's Water Tray: The proofer's water tray helps maintain ideal humidity (60 to 80%) for rising dough, ensuring a perfect environment for fermentation.
- Divide and Pre-shape the Dough: Divide the dough into equal portions and pre-shape them into rounds or desired shapes. This step helps create a uniform crumb structure in the final loaf.
- Add Dough to Proofer Oven for Bulk Fermentation: Place the prepared dough in the proofer oven for bulk fermentation. This stage allows the dough to rise and develop flavor before shaping.
- Shape the Dough into Your Desired Shape: Take each portion of dough and shape it into the desired form for the type of bread you're preparing, whether it's a boule, batard, baguette, or any other shape you prefer.
- Proof the Dough in the Proofer Oven: Place the shaped dough back into the proofer oven for the final proofing stage. This allows the dough to rise one last time before baking.
- Allow Sufficient Time for Proofing: The proofing time can vary depending on the recipe and the ambient temperature. Generally, bread dough should be allowed to double in size during the proofing process. In a proofer oven, this can take anywhere from 1 to 2 hours for active dry yeast bread and around 3 to 4 hours for sourdough.
- Score the Bread: Before baking, score the bread with a bread lame to control the expansion of the dough during baking and create an attractive pattern on the crust.
- Bake the Bread: Preheat your oven to the recommended temperature and bake the bread according to the instructions in your recipe.
Bread Proofing Tips
Now that you know the basic steps of proofing bread, it's time to perfect the process. Follow these tips and tricks to troubleshoot and optimize your bread dough while it proofs.
- Temperature Control: Yeast activity is directly influenced by temperature. Maintain a warm, draft-free environment to encourage yeast fermentation. Ideal proofing temperatures typically range from 75 to 85 degrees Fahrenheit.
- Covering in Proofer Oven: Most doughs and shaped loaves will not need to be covered while in the proofer oven, allowing them to breathe and develop a good crust. Some recipes require spraying the dough with water during the proofing stage to prevent it from drying out prematurely.
- Dough Water Temperature: The temperature of the water or liquid used to mix the dough affects its temperature. Ideally, the dough temperature should match the rising temperature, so adjust the water temperature accordingly. Using cooler water may result in a longer proofing time, so be mindful of the temperature to achieve the desired rise.
- Dough Handling: Handle the dough gently during the proofing process to prevent deflation. Avoid excessive punching or kneading, as this can disrupt the fermentation process and affect the final texture of the bread.
- Testing for Readiness: To determine if the dough is adequately proofed, use the finger poke test. Gently press your finger into the dough; if the indentation slowly springs back, the dough is ready. If it springs back quickly, the dough needs more time to proof.
How Long to Proof Bread

How long you must proof bread depends on where the bread is proofing. We explain the average proofing times for bread when stored at room temperature, standard ovens, proofer ovens, and the refrigerator.
How Long to Proof Bread at Room Temperature
The proofing process at room temperature typically takes between 1 to 2 hours. However, the time required can vary based on factors such as the type of bread dough, ambient temperature, and humidity levels in the environment. Sourdough leavened bread will take longer, between 1 to 4 hours.
For lean doughs, like baguettes or ciabatta, proofing at room temperature for about 1 to 1 1/2 hours is usually sufficient. They contain minimal fat and sugar, allowing them to rise relatively quickly. Rich doughs, such as brioche or challah, which have higher fat and sugar content, benefit from a slower rise, which helps develop their flavor and texture. Proofing rich doughs at room temperature for 1 1/2 to 2 hours is often recommended.
How Long to Proof Bread in Oven
Typically, the proofing time for bread in an oven ranges from 30 minutes to 2 hours. However, you must monitor the bread closely during the proofing process to achieve the desired texture and rise. The oven's temperature plays a significant role in the proofing process. A warmer oven will speed up the proofing time, while a cooler oven will slow it down. Generally, bread dough should be proofed in the oven for 30 to 60 minutes at a temperature of around 75 to 80 degrees Fahrenheit.
One effective method to create suitable proofing conditions in the oven is to place a water tray on the lower rack. The water tray helps maintain a humid environment, preventing the dough's surface from drying out and forming a crust prematurely. Additionally, the moisture in the oven promotes yeast activity and enhances dough elasticity, contributing to a better rise and texture in the finished bread.
How Long to Proof Bread in Refrigerator
Typically, bread dough proofed in the refrigerator will take anywhere from 8 to 24 hours to fully rise. The exact time will depend on factors such as the type of bread dough, the recipe, and the temperature of your refrigerator. It is recommended to check on your dough periodically to ensure it is not over-proofed.
Proofing bread in the refrigerator is a convenient method that allows for flexibility in your baking schedule. If you are planning to proof bread in the refrigerator overnight, we advise covering the dough with plastic wrap or a damp cloth to prevent it from drying out. This will help maintain the moisture in the dough and prevent a hard crust from forming prematurely.
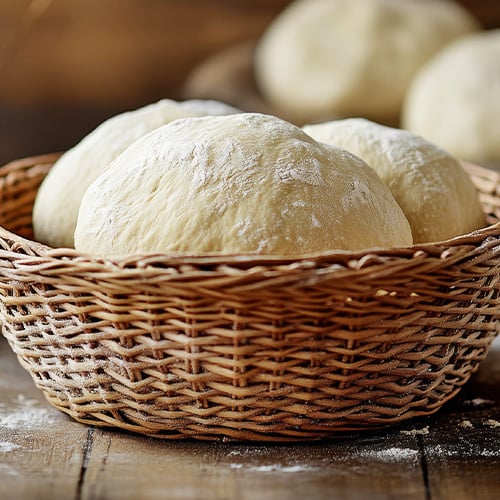
What Is a Proofing Basket?
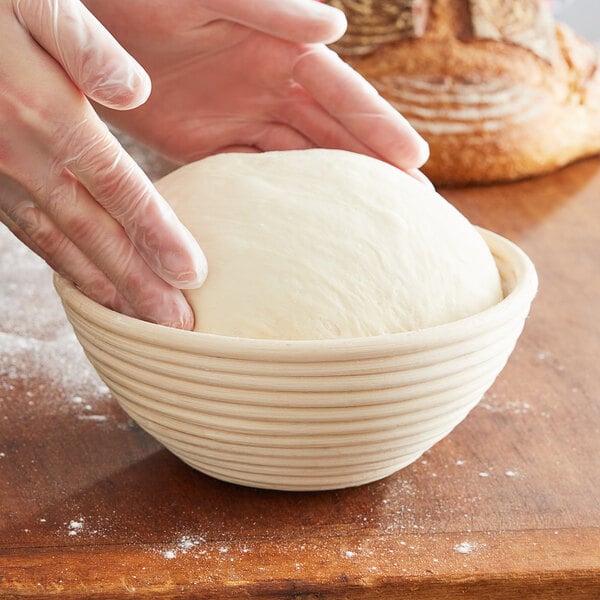
A proofing basket, also known as a banneton, is a tool used in the bread-baking process to support the dough as it rises and develops its shape, helping create a uniform crumb structure and a beautifully textured crust. These baskets are typically made from natural materials like rattan or cane, which help absorb moisture from the dough and create a slightly humid environment that prevents the dough from sticking. The basket's natural material also provides ventilation, allowing the dough to breathe and develop flavor as it proofs.
Proofing baskets come in various shapes and sizes, including round, oval, and rectangular, allowing bakers to create different types of bread loaves. The ridges and coils on the inside of the basket leave a decorative pattern on the bread's crust, adding visual appeal to the finished product. Choose the basket size based on the amount of dough you must proof, ensuring that the dough has enough room to rise evenly without spreading too thin.
How to Use a Proofing Basket
A proofing basket helps you create attractive loaves with even crumb structures. You can follow the steps below to raise your dough in a proofing basket.
- Prepare the Proofing Basket: Before using the proofing basket, lightly dust it with flour to prevent the dough from sticking. This step facilitates easy removal of the dough once it has proofed.
- Shape the Dough: After the dough has been kneaded and rested, shape it into a ball or loaf and place it into the prepared proofing basket. Make sure the seam side of the dough is facing up to create tension on the surface, which helps the dough rise evenly.
- Cover the Dough: To prevent the dough from drying out during the proofing process, cover it with a clean kitchen towel or plastic wrap. This also helps to create a humid environment, which is ideal for proofing.
- Allow the Dough to Proof: Place the proofing basket in a warm, draft-free area to allow the dough to rise. The time needed for proofing will vary depending on the recipe and ambient temperature, but typically ranges from 1 to 3 hours.
- Check for Proofing Readiness: To determine if the dough has proofed sufficiently, gently press your finger into the dough. If the indentation remains and slowly fills back in, the dough is ready to be baked. If the dough springs back quickly, it needs more time to proof.
- Transfer the Dough: Carefully invert the proofing basket onto a baking sheet or peel lined with parchment paper to transfer the dough for baking. Gently lift the proofing basket off the dough to maintain its shape.
What to Do with Over Proofed Bread
Few things are as disappointing to a baker as finding that their bread dough over proofed. Over proofed bread doesn't rise well when baked and produces a dense and flat final product. Thankfully, there are ways you can troubleshoot over proofed bread dough.
- Evaluate the Bread: When you notice that your bread has over proofed, the first step is to assess the extent of the damage. Look for signs such as a collapsed center, excessive air bubbles, or a sticky texture. These are indicators that the bread has proofed for too long.
- Reshape and Re-Proof: If the over proofed bread is salvageable, gently reshape it into a loaf or desired shape. Place it back into a lightly greased or floured proofing basket or pan. Allow the bread to undergo a second, shorter proofing period to help regain some structure.
- Bake Immediately: To prevent further over proofing, bake the bread as soon as it has regained some of its shape. Preheat your oven to the recommended temperature for the type of bread you are baking and carefully transfer the bread to the oven.
- Adjust Baking Time and Temperature: Since the bread has already undergone an extended proofing period, you may need to adjust the baking time and temperature. Keep a close eye on the bread as it bakes to ensure that it does not become overly dark or dry.
- Use for Other Purposes: If the bread is too far gone to be salvaged as a loaf, consider repurposing it to prevent food waste. Over proofed bread can be transformed into delicious croutons, breadcrumbs, or even used in bread pudding recipes.
Types of Bread Proofers
When it comes to proofing bread, having the right equipment is essential to ensure consistent and high-quality results. Bread proofers are specialized appliances designed to create the ideal environment for dough to rise properly. There are several types of bread proofers available on the market, each offering unique features to cater to different commercial baking needs.
- Proofing Cabinets: Proofing cabinets are commonly used in commercial bakeries, restaurants, and other foodservice establishments. These cabinets provide a controlled environment with adjustable temperature and humidity settings to facilitate the fermentation process of the dough. They come in various sizes to accommodate different batch sizes and production volumes.
- Retarder Proofer Units: Retarder proofer units combine the functions of proofing and retarding dough in a single appliance. These units have separate compartments for proofing and retarding, allowing bakers to control the temperature and humidity levels independently. Retarder proofer units are ideal for bakeries that require flexibility in their production schedules.
- Proofer Oven Combos: Oven proofer combos combine the functionality of a proofer, which provides a controlled environment for dough to rise, with that of an oven for baking. This dual-purpose unit helps streamline the baking process by allowing for proofing and baking in the same space, saving space, time, and labor. Proofer oven combos come in various sizes to accommodate different production needs.
- Countertop Proofers: Countertop proofers are compact and space-saving options for smaller bakeries, cafes, and food trucks. These units are designed to proof smaller batches of dough efficiently while occupying minimal counter space. Countertop proofers are a practical choice for businesses with limited kitchen space but still want to ensure consistent proofing results.
- Mobile Proofing Racks: Mobile proofing racks are versatile solutions for bakeries and foodservice establishments that must proof large quantities of dough simultaneously. These racks typically feature multiple shelves for holding sheet pans or trays of dough. The mobility of these racks allows for easy transport of proofed dough to ovens or other production areas. For moisture and temperature control, pair them with a bun pan rack cover.
After following the steps outlined in this guide, you should now have a better understanding of the bread proofing process and how to achieve optimal results. Remember to consider factors such as temperature, humidity, and proofing time. Experiment with different proofing methods to find what works best for your specific recipes and baking environment. With practice and attention to detail, you can master the art of bread proofing and elevate the quality of your baked goods.